How to use
CATEYE PADRONE SMART +
Setup Flowchart
2. Install Cateye Cycling™
3. Pairing a smart computer with a smartphone
4. Pairing a sensor or a Shimano DI2 system with a smartphone (If you have sensors or a DI2 system)
5. Mounting the bracket
The bracket can be mounted on either the stem or the handlebar.
Watch video
Bracket
Bracket band
See illustrations
![]() When mounting on the handlebar
When mounting on the handlebar
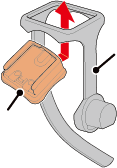
![]() Mounting and removing the smart computer unit
Mounting and removing the smart computer unit
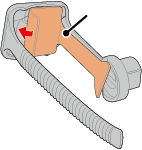
1. Check bracket orientation and attach it to the bracket band.
Copyright © 2019 CATEYE Co., Ltd.
2. Remove the seal from the bracket rubber pad and stick the bracket rubber pad onto the bracket band.
Bracket rubber pad
3. Loop the bracket band around the stem and tighten the dial to secure it.
Dial

Cut

Caution
• Always tighten the dial by hand.
Using a tool or other object to tighten the dial may crush the screw thread.
• Trim bracket band carefully so the cut end will not cause injury (see step 3 above).
Bracket band
Bracket

2. Remove the seal from the bracket rubber pad and stick the bracket rubber pad onto the bracket band.
Bracket rubber pad
3. Loop the bracket band around the handlebar and tighten the dial to secure it.
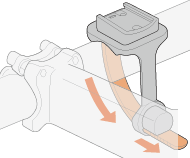
Dial
Cut
Caution
• Always tighten the dial by hand.
Using a tool or other object to tighten the dial may crush the screw thread.
• Trim bracket band carefully so the cut end will not cause injury (see step 3 above).
Mounting
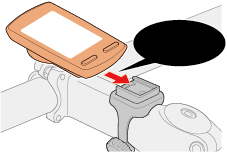
Click
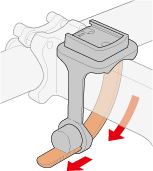
Removing
While holding smart computer
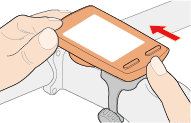
Push out
Caution
To remove smart computer, push out while holding the unit with the other hand to ensure that it does not fall.
6. Mounting the speed (cadence) sensor (ISC-12)
(Optional)
7. Wearing the heart rate sensor (HR-12)
(Optional)
Usage Instructions